
Artbook Sketching in Houdini
This style captures the immediacy and energy of a quick sketch. It features loose, expressive lines that dance across the page, suggesting form and movement without focusing on precise detail. You can almost hear the scratch of the drawing tool against the surface.
TABLE OF CONTENTS
1. Scene Setup
Most of the presets in this pack, if not all of them, require the presence of a UV map on all the objects. If you decide to use your own scene, you can do so as long as you take into account that without a UV map present on all the objects in your scene then the preset will not function as intended and you will have a visually unpleasing result.
This preset requires an additional light source to function properly. So go ahead and create another PxrDistantLight. Rotate the light to point to the left side of our view. You can move it for visual clarification as the image below.
The value of the light is not important, so keep the defaults.
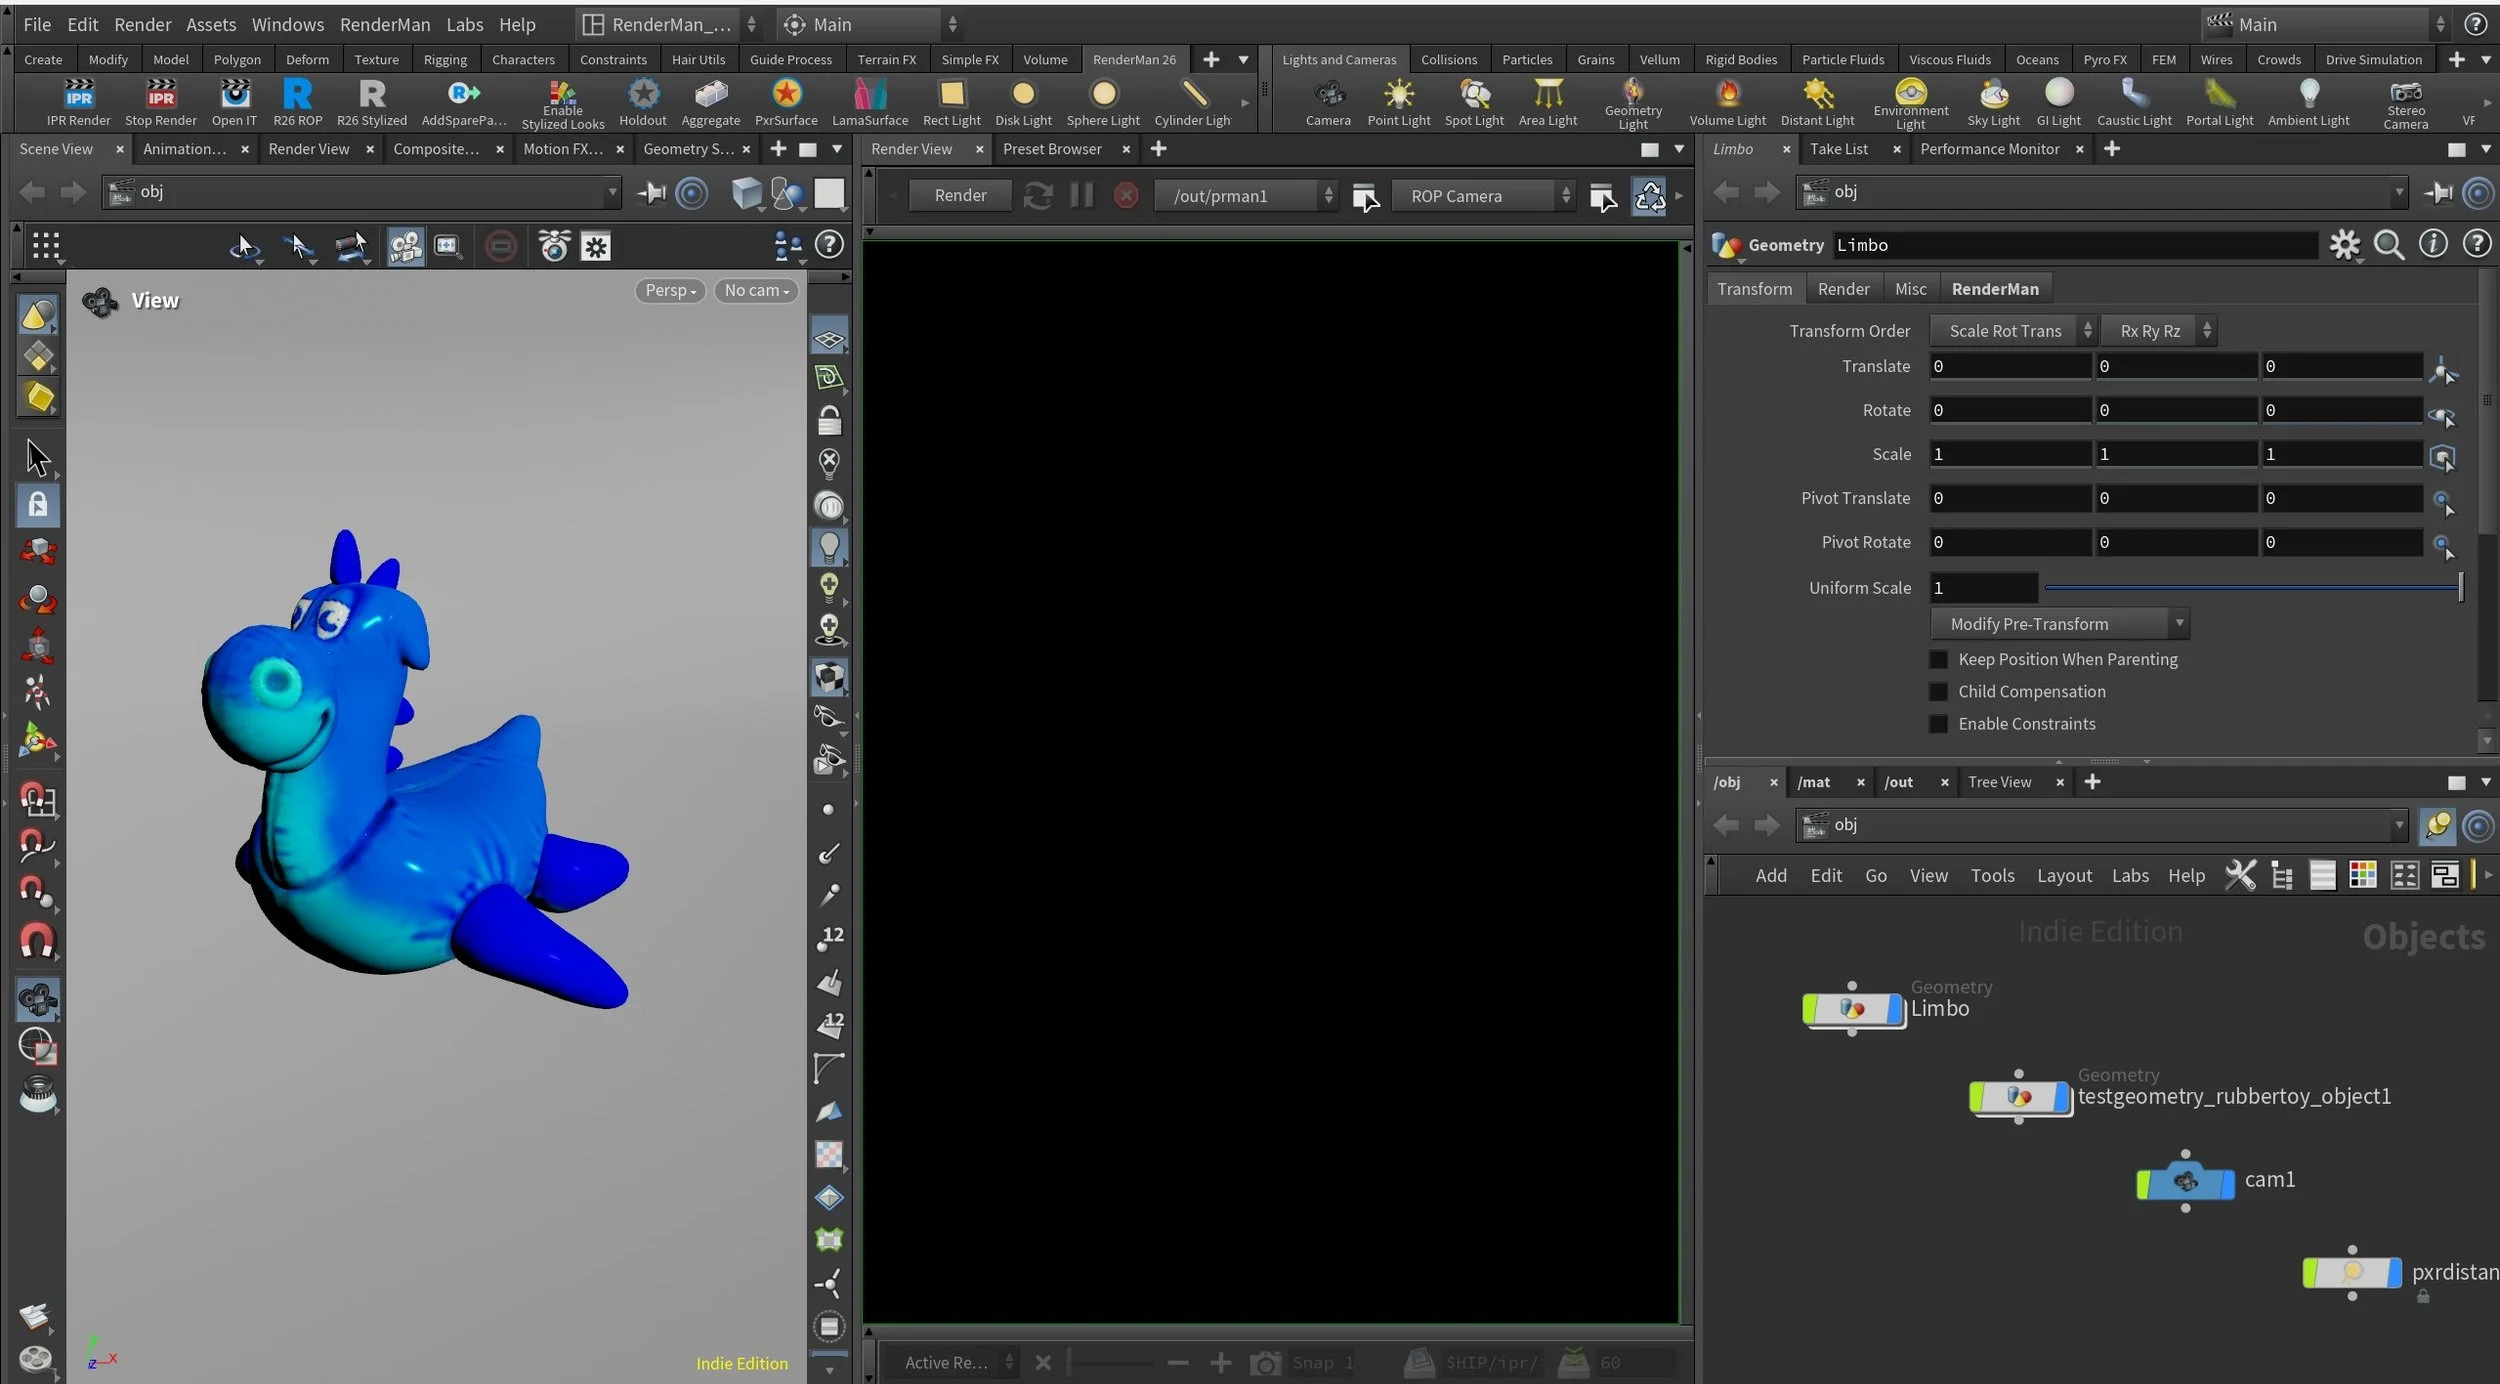
The template.hiplc can be downloaded from the RenderMan Resources section. the Houdini project file include the template file along with all the completed projects for each brush type. We’re going to learn how to apply the preset to a brand new scene and then you can compare your results to the completed project.
Let us explore the template scene. It consists of two objects, A RubberToy and a Cyc (a.k.a Limbo). Both objects have UVs, see not below the image.
We also have one Distant light with a direction coming from the right side. There is a camera as well.
Both objects have their own PxrSurface materials. This will not matter once we import the preset because those materials will be replaced.
Alongside a distant light the scene is set with an RIS ROP with a PathTracer Integrator. The PathTracer Integrator Max Indirect Bounces is set to 0. Both of the choice of a Distant light and setting the Max Indirect Bounces to 0 are important for the look we are after but it is not a requirement for Stylized Looks. The importance is three folds.
I tend to use sharp shadow in all of my scenes so a Distant Light is the best choice to achieve that type of shadow.
I don’t want indirect light or additional light bounces to influence my lighting. All the direct and indirect lighting manipulation happens within the Stylized Looks framework, so no need for additional lights.
The combination of both a Distant light and Max indirect bounces results in the least amount of noise to sample through or even noise around the edges of the toon stepped shading. It is not as completely noise free as using the new Artistic Toon mode, but it is around 90% there while still being physically accurate.
We’ll also need to assign each light to a Light Group for use later in our LPE AOV. So bring the properties of the first light. Click Advanced under the Light tab. Find the Light Group field and type MAIN as the image above. Do the same for the EDGE light and this time give it the name EDGE.
Load the We’ll start by loading our template.hiplc file. Set your project directory to the presets project folder and load template.hiplc.
2. Import The Preset
Time to import the preset. Select the Toy object and open a RenderMan Preset View. Select the Artbook Sketch preset, right click and select Import and Assign to Selected
We’ll need to apply our preset on a single object. We’ll then make a copy of the material and apply that to the limbo object. The reason we do it only once is because the import preset mechanism in Houdini will import all the displayFilters for Stylized Looks. So if we import it twice then we’ll have two sets of each filter and that will cause the stylized looks to fail. There is currently no way to specify which parts of a Stylized Looks you want to import.
3. Apply Limbo Material
With the preset imported we are going to apply a second copy of our main material to the Limbo object.
You might be asking why do we need to copy the material on the limbo instead of creating a new one? or Why don’t we apply the same material of the toy object to the limbo? We’ll explore those questions and in the process we’ll learn a little bit on how Stylized Looks work and how shading networks setup work.

Why don’t we keep the current Limbo material or create a new one? The short answer to this is that for a material to function properly, really it is about having the displayFilters recognize the object and apply the Stylized Looks, then we need a certain setup added to the main surface of the object. By copying the material we have a starting point to go from with all the required material connection in place.
Stylized Looks doesn't mess with your original surface, so you can keep your existing shading networks. But to make it work, you need to add a PxrStylizedControl to the Utilities pattern of the surface. This won't break anything as the utilities pattern is like an auxiliary channel, and it lets you control the stylized look for each object separately. If you want to add more shading nodes to change the stylized look, do it on the PxrStylizedControl.
Why not use the same material as the one applied to the Toy object? The object UV size and object size determines the brush size. So we need separate values to tweak on an object by object level. Also, we sometimes we need different albedo color value for each object. This is way we give each object it’s own material.
For this preset the albedo or diffuse color is the same across all objects. However we need to tweak the PxrManifold2D that is connected to the PxrStylizedcontrol for the Limbo as well as change the Triplanar Scale values for the Limbo object. We’ll deal with those changes in step No.7.
4. ROP Setup
Up to this point we haven’t said much about the ROP setup and the rendering requirements. We’’re going to address that right now. If you are using the presets in this pack then this following step is going to be the same for all.
The template.hiplc file include an RIS ROP already setup. This ROP is configured to use a PathTracer as an integrator.
The PathTracer is configured to have 0 Max Indirect Bounces. This is important as it will be the equivalent to using PxrDirectLighting as an integrator, so our renders will be noise free, or minimal noise. But with a PathTracer we will have access to additional AOVs and LPEs which we don’t have access to in PxrDirectLighting.
However, when we import any Stylized Looks presets the preset browser will generate a new ROP for our scene. This ROP will have a direct connection to all the Stylized Looks displayFilters that make up the preset with the order they are intended to be used. So what I would do usually is to copy the path of our PathTracer integrator from the template ROP node to our new Preset ROP and delete the template one. So we end up with only a single ROP file in our project.
That is step 1 completed. We have a new ROP in our scene, it includes links to our displayFilters and it has our preconfigured PathTracer brought over.
Now for step 2. We must activate Stylized Looks in our ROP. This is not accomplished by pressing a single button, but require a collection of AOVs to be enabled. The list is quite long and it tends to take a minute or two to do. Instead of doing it by hand I have prepared a simple script that does that for you.
You can download the script from this github repo. Once downloaded, you can add it to any shelf as a button. I did mine inside of the RenderMan shelf, gave it the name “Enable Stylized Looks” and even gave it an icon.
For most of the presets these 4 steps is all that is required to hit that render button. This particular preset isn’t one of them, it needs only additional step, it’s not a complex one so bare with me. We’ll tackle that step next. But before we need to have a recap and see what we’ve done so far as the steps we’ve taken so far are the same for any of the presets in this pack.
RECAP
Before we move forward, let us recap what have we done so far, as these steps are pretty similar for all the presets in this pack. Any difference will be an additional light added to the template.hiplc projct and/or an additional AOVs that need to be present. For this preset we’ll need additional AOVs which we’ll do in the next step. But for all the presets the steps are as following:
Make sure you have a scene with UV maps
Have at least one PxrDistantLight as your main source light.
Apply the preset to your main object, or one object in the scene.
Make copies of the material and assign those copies to each object in your scene.
Copy the existing Pathtracer Integrator to the new preset ROP
Run the AOV script while selecting the prest ROP to create the default AOVs required by the Stylized Looks.
Can you use a PxrRectLight instead of a PxrDistantLight with Stylized Looks? You certainly can. And there is no rule that says you shouldn’t. But in my work, and this is a personal preference, I tend to use a PxrDistantLight because:
A it resolves faster. Meaning I don’t need many samples
I like my objects to have sharp shadows.
Works really well with a PathTracer Integrator with 0 Max Indirect Bounces. Again, less samples to work and much faster rendertimes.
5. LPE Setup
This presets requires additional AOVs to function, so we’ll add them now to our list of AOVs.
We need to add 4 additional AOV, we’ll be using LPE to create those.
Scroll down to the Custom section in the Extra Image Planes and create 4 custom AOVs by clicking the plus button 4 times.
Now next to the source of the first one, there is a drop down menu. Click it and:
Select Direct Diffuse for the first AOV
For the second one select Direct Specular.
And for the 3rd one Direct Diffuse.
Lastly, for the 4th one select Direct Specular.
This will add an expression in each of the source field. It will not populate the names of the AOVs though. So go ahead any name them as following:
directDiffuse_MAIN
directSpecular_MAIN
directDiffuse_EDGE
directSpecular_EDGE
Last step is to tell the LPE which light should the AOV account for. Currently it is accounting for both lights, and we want to change that to account for specific lights. So after the . at the L letter, add:
‘MAIN’ for first one
‘MAIN’ for the second one.
‘EDGE’ for the 3rd.
‘EDGE’ for the 4th.
6. Initial Render
Okay, that doesn't seem very appealing. Allow me to explain what is going on and how we can achieve the desired look. Before we dive into some core Stylized Looks hatching concepts, I suggest you get your favorite hot or cold beverage ready.
7. Tweaking Values
Ok! So that doesn’t look good. Let me explain what is happening here and how to resolve them. You’ll find that for almost all presets this will be the same one way or another. It might not be required in your scene, but in this scene the Limbo object UV scale is quite different than the Toy object so there is a noticeable difference.
There are many displayFilters in this presets. We can break them down to different categories based on their function in the styling process:
1x PxrStylizedToon filter to produce the desired toon stepping AOV. It will be used as a signal for specific hatching filters downstream.
5x PxrStylizedHatching filters produce, or describe the sketching brush look
2x PxrStylizedLines filters to produce the desired line-work
2x PxrStylizedHatching filters for effects
Right now we’re interested in 2 of the 3 main hatching filter. The hatching showing in the shadow area coming from our MAIN light, and the shadow hatching that is coming from our EDGE light. The EDGE hatching seams to be the worst on both object, currently it looks like a brick wall. The MAIN hatching (called Etch in the display filters) is ok on the Toy object, but requires tweaking on the Limbo. So let us deal with those.
NOTE
Specific Pattern in the Presets Pack
When working with the template.hiplc and importing the presets, you'll encounter recurring steps that require editing for the same objects and nodes. This is because the presets were created using the RenderMan official Swatch scene, which has its own scale and UV scale for each object.
Template.hiplc Objects
The two objects in template.hiplc have different UV scales compared to preset material, and they also have different UV scales from each other. As a result, the RubberToy requires a slight decrease in the PxrManifold2D ST frequency, while the Limbo needs a significant increase. It's helpful to remember these values, as you'll be reusing them for each preset when using them with template.hiplc.
Common Theme Among Presets
While there may be additional variations between the presets, there is a common theme across many of them, especially those with a single color theme.
Where Things Differ
The differences arise when each object requires its own color or when a different camera range is needed for screen space hatching. However, for the majority of the presets in this pack, the edits are largely the same when applied to template.hiplc.
Unique Scenes
Keep in mind that your own scenes will be different, so the default values we provide may not work for you. It's crucial to use values that are tailored to your specific scene. The difference lies in the value of the UV scale, not the actual setup. The steps outlined in this document should help you get started with any scene of your own.
The note above mentions PxrManifold2D in connection with UVs. Let's explore why they are used in this context and why you should be familiar with them.
Stylized look images are essentially constructed using three main display filters:
PxrStylizedToon: This node defines the lighting response for toon shading.
PxrStylizedHatching: Despite its name, this node is actually the brush used to paint the scene or objects.
PxrStylizedLine: This node handles all the line work.
There's also PxrStylizedCanvas, but it's not relevant to this context or these presets.
In this guide, we'll focus on the PxrStylizedHatching display filter and how it applies the brushes of our presets to each object.
Brushes are applied to objects, or more specifically to objects whose shading network contains a PxrStylizedControl node, in one of three ways:
Screen Space: This overlays the brush across all objects with a PxrStylizedControl node from the camera's point of view.
Triplanar: This creates a triplanar projection on all objects in the scene, which can be tweaked individually or globally. It's great if you want random overlapping projection with modes to adhere to the surface during animation or deformation.
NPRtexture Coords AOV: This daunting name simply means that any manifold or projection node plugged into the NPRtextureCoordinate input of the surface PxrStylizedControl is used. This can be PxrManifold2D, PxrManifold3D, PxrProjector, or PxrHexTileManifold.
I personally prefer PxrManifold2D because it allows me to use UV maps to orient brushes on a single surface. It has limitations due to seams between UV islands, but it works for most of my scenes. That's why you'll always find a PxrManifold2D plugged into the surface for each preset in this pack, even if it's not used. I've even created a Maya script to automatically plug one for any selected PxrStylizedControl node.
Here's a secret: Just because there's a PxrManifold2D node connected and the hatching is set to NPRtexture Coords AOV doesn't mean you have to use it. Most of the completed scenes with variations in this pack have the PxrStylizedHatching display filter changed to something else. I encourage you to experiment. The result may initially look terrible, but you can tweak various filters and scale values until you're satisfied. The good news is that each display filter is properly named, so you'll know exactly what to change. The steps below to tweak the hatching on our Limbo object will teach you a fundamental method for working with Stylized Looks: setting global values shared across the scene and only adjusting individual trouble objects to achieve the desired scene hatching scale.
In this section, we won't change the hatching projection mode. Instead, we'll keep the preset projection intact and adjust the problem objects to reach the desired scene hatching scale.
1. Increase PxrManifold2D for Limbo:
For the MAIN Etch brush or hatching, first, navigate to the Limbo object's applied material and locate the PxrManifold2D node connected to the PxrStylizedControls node.
In this preset, there should be one connected to Hatching Projection. If there are multiple PxrManifold2D nodes, always check the one connected to Hatching Projection; that's the one you want to adjust.
Change the default frequency for S and T from 20 to 50 or 60, depending on your preference. You can test render to see the effect on your Limbo object. Based on the desired size of the etch streaks, I used 60 for both S and T, which matched the Toy Object.
2. Increase Triplanar Scale for both objects:
The next brush we want to fix is the dashed hatch that currently looks like a brick wall. It is wrong on both objects so it would stand to reason to change it at the hatching filter instead on the object level. My issue there is that the Dashed filter is using 8 progressive values for each shading zone, so it will not be a quick change and it will certainly take long to resolve if we need to try different numbers.
Instead what I would normally do is get the base of the Triplanar Scale for both object into a similar frequency scale on the material level and then if I want to make a global change for all then I can be sure that that change will be identical across all materialsWe need to modify the dashed hatch, which resembles a brick wall and is incorrectly applied to both objects. The most efficient approach is to make this adjustment at the hatching filter level, rather than at the object level. However, the Dashed filter utilizes eight progressive values for each shading zone, so changing it might be time-consuming, especially if we need to try different numbers.
An alternative solution is to set the base Triplanar Scale for both objects to a similar frequency scale on the material level. This way, if we make a global change, we can be sure that it will be consistent across all materials, ensuring a uniform modification.
To tweak the values to the correct scale start by select the PxrStylizedControl for the Toy object and change the Triplanar Scale X, Y and Z in the Hatching projection category to be 5.
As for the Limbo object. Change those Triplanar Scale values to be 3.
3. Change camera range for the Halftone filter:
The final change we’ll be making involves our screen hatching filter. I am using a custom brush to give the whole scene a Halftone feel. So start by navigating to the out network and locate the filters_Artbook_Sketch collection. This is where all the filters in our scene lives.
The filter we are after is named PxrStylizedHatching_Halftone_Screen. In my desktop configuration, which is based on my monitor resolution, the display filters were stacked into 3 rows, starting from the right to left. The filter in question was on the last row, second from the right. You arrangement might be different so that is ok.
This is not going to be a quick fix as this is considered an advanced topic, so it is not a single value we are going to change. The reason is because even though this filter is supposed to act as an overlay, I tend to make my life a bit more difficult and challenging by modifying the behavior of certain elements, in consequence this will lead your work to be more challenging 😁 In this case I am changing the frequency of the project based on the camera range.
First we need to know our new camera range. This can be easily done by doing an IPR render. You don’t have to finish the IPR render in full, you can stop it. Next open the Catalogue pane if it is not open on IT. You can quickly do that by pressing the letter C on your keyboard. You’ll see your last render and other ones if you’ve been consistently rendering to IPR. Select the last render and expand the image to show the list of AOVs by pressing on the small arrow key or by pressing the down arrow key while selecting the last rendered image.
Locate the NPRlineNZ AOV. The camera range reads the depth information from the NPRlineNZ AOV Blue channel. So we want to press the letter F on the keyboard. Yes letter F displays our Blue channel!
Our IT viewer will turn white! Don’t worry, our values are there, we just have to change our exposure levels to see it, so dial the exposure to -6 and you’ll start to see the depth values. Move your mouse over the nose of the Toy object and read out the last pixel value on your pixel readout. mine shows something close to ~10.2, and if I move my mouse to the furthest point in your Limbo it is close to ~16.7.
I’m going to be using 10 and 16 for my camera range values.
Before you move forward return IT to it’s normal state. So zero out the Exposure level and press A to see all channels instead of the Blue channel.
If you have the PxrStylizedHatching_Halftone_Screen display filter still selected. Go to the Input Tab and expand Camera Range. Use 10 for Cam Dist Z Min and 16 for Cam Dist Z Max. And now you should be ready to render the image and see the preset in all its glory.
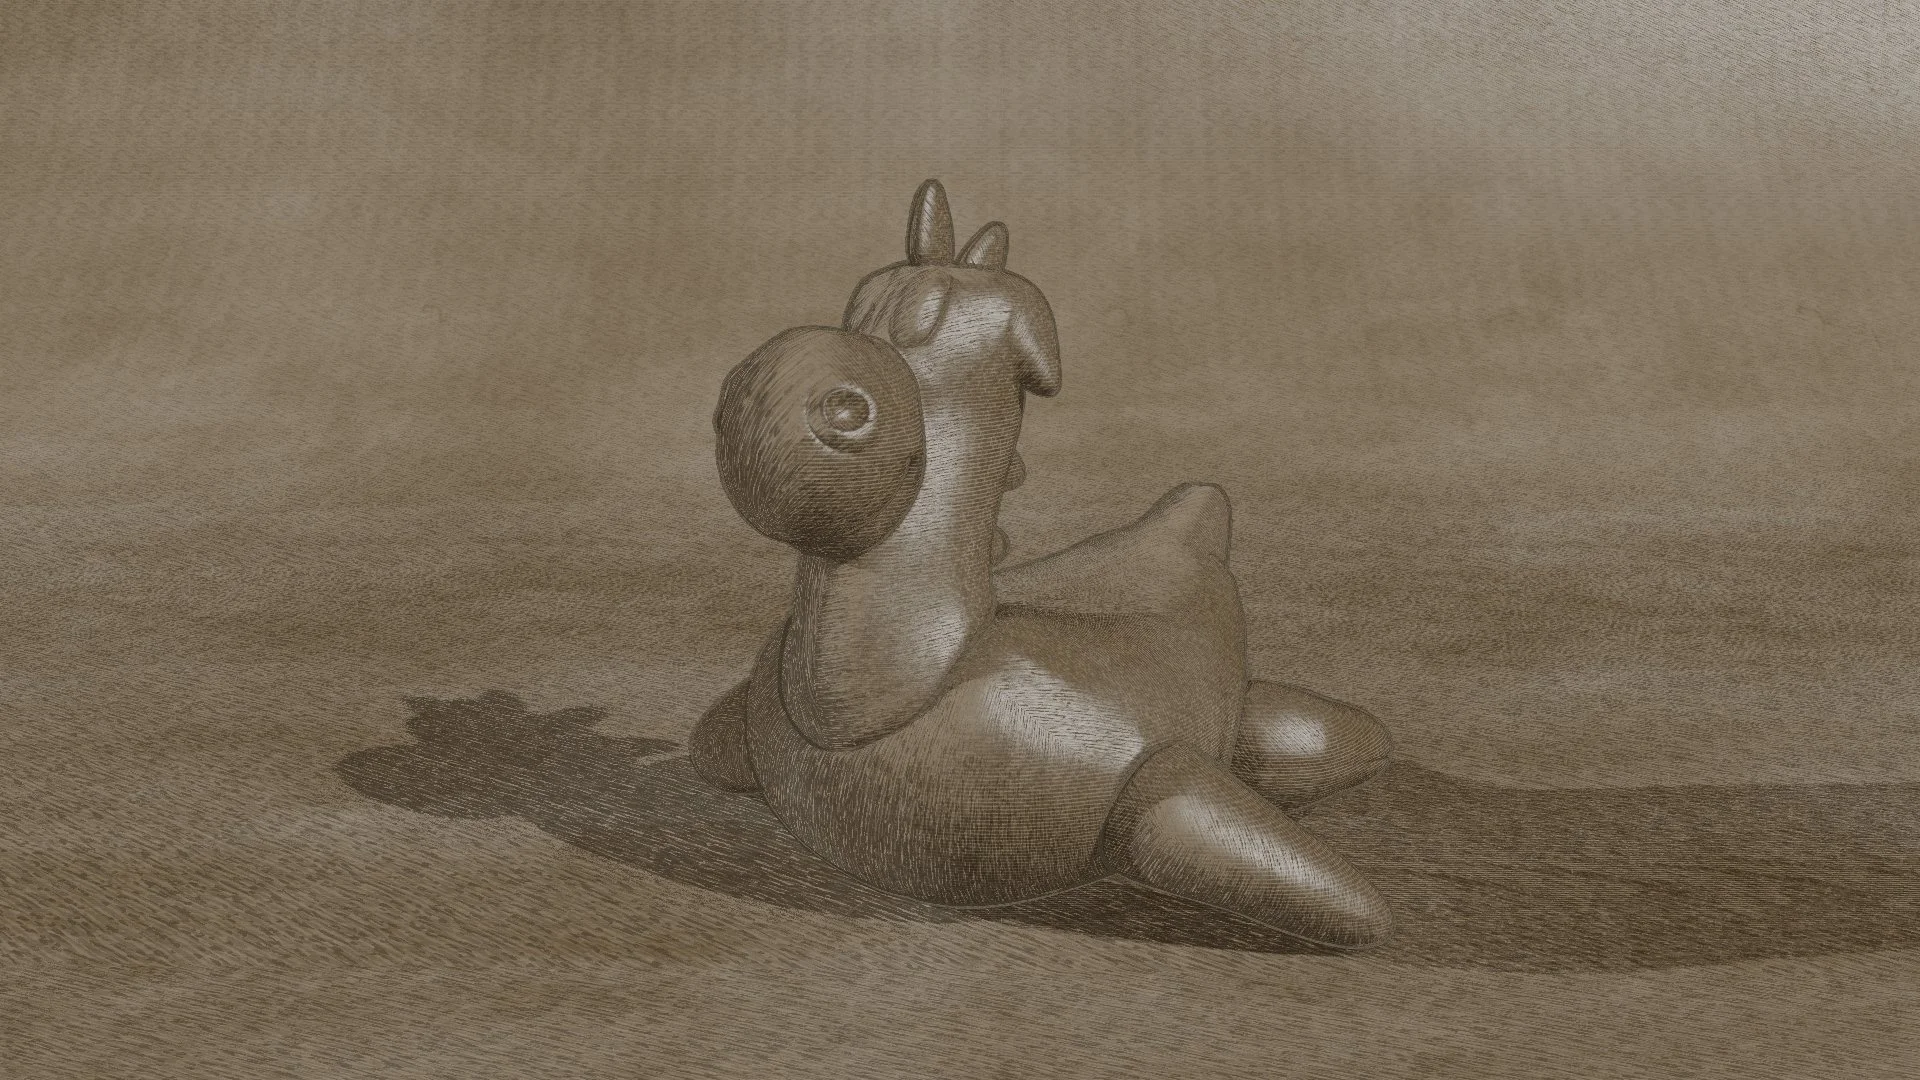
Congratulations!
You’ve made it through and you’ve done your first Stylized Looks render. 🎉
These steps might have seamed like a lot. And they are if you just started using Stylized Looks. As you gain more proficiency with Stylized Looks you’ll be able to set this up quiet quickly. And most of the presets aren’t that involved and will load out of the box, so instead of 7 steps they would be 4 steps. Tweaking the hatching values will always be required, so this long tour is necessary so you know how to get the most out of these presets and to learn how to tweak the stylized looks for your own project.
Preset perfection? Show your appreciation!

Back